Tracking codes are used to monitor the journey of investors during the checkout process. If you want to utilize your tracking codes in Google Tag Manager (GTM), we'll guide you through the process by providing a list of triggers that you can use to collect data and make decisions. You'll create and configure the tracking code in GO to make it usable in GTM.
In this guide, we'll illustrate a use case for completing an investment.
What is Google Tag Manager?
Google Tag Manager allows for the easy management and customization of tags through a web-based interface. Tags are small snippets of code that are inserted into the JavaScript or HTML code of a website to capture specific information. Tags relevant for marketing purposes could include those for tracking user dwell time or identifying the source of website visitors.
Collecting data is crucial for expanding your company's online presence and building a stronger connection with your target audience. Analytical tools like Google Analytics and similar services simplify data collection, and tags are a crucial tool for enhancing the efficiency of these tools.
In essence, tags are small snippets of code that you insert into the JavaScript or HTML code of your website. Their purpose is to extract specific information that is valuable for your business. This information can include visitor dwell time on your website, form submissions, the origin of visitors, tracked links, or even details like products removed from the shopping cart. Understanding this tag information is crucial for your company's success in the online realm.
https://developers.google.com/tag-platform/tag-manager/web?hl=de
Benefits of GTM
Another advantage of Google Tag Manager is increased efficiency because the marketing department can now take full control of tags once the technical aspect is handled. The use of tags also contributes to higher accuracy in your analytics system: you receive higher-quality reports and can gain a more precise understanding of your target audience.
Of course, it's recommended to try the tool for yourself to determine if it's a suitable fit for your company. Google Tag Manager is, by the way, free to use.
Below, we'll show you how to set up a Google Tag Manager account, create new tags, use Google Tag Manager with your Google Analytics account, and embed the tool in WordPress.
1. Setup and Configuration
Start by creating a GTM account and a container. Configure the container to track the domain of the investment process. For more information, you can refer to the official GTM documentation.
Note: GTM suggests embedding the tag on your website using the two code snippets depicted, but only the first one in Fig. above is required for reliable functionality. The second code snippet in Fig. above is not necessary. The following table summarizes the requirements and supported elements in GO.
GO - Tracking Module
Continue by copying the code snippet that should be inserted into the <head> section of your website. This piece of code contains your GTM container ID (grayed out in the image below).
- Create a new tracking code under Marketing Tools.
- Create a tag for all page views following this configuration: Name: Give it a meaningful name to distinguish it from your other tracking codes.Trigger: Select the step for which you want to define your tags. In this example, choose "Every Page View." Code Tag: Insert the code from Figure above. Active: You can leave the tracking code in the draft version and save its temporary configuration by not checking the box.
- Create a tag for all page views following this configuration: Name: Give it a meaningful name to distinguish it from your other tracking codes. Trigger: Select the step for which you want to define your tags. In this example, choose "Investment Process Completed." Code Tag: Define the variables you want to expose during the investment confirmation step. Common/typical variables include the investment amount and the reference. You can find the complete list of variables here. To pass the variables correctly to the GTM data layer, insert the following code:
<script>
  window.dataLayer = window.dataLayer || [];
  window.dataLayer.push({
    'investor': '{{investor.identified}}',
    'orderID': '{{investment.reference}}',
    'conversionvalue': '{{investment.amount}}',
    'projectname': '{{investment.project.name}}',
    'eventName': 'investmentComplete'
  });
</script>
CODE
This code snippet displays all five of these variables upon completing the investment. In the next section, we'll show you how to view your values in the GTM console.
Active: You can leave the tracking code in the draft version and save its temporary configuration by not checking the box.
Now, you've set up everything in our tracking module.
Google Tag Management Console
You'll need the configuration that corresponds to all the tags and triggers you've defined in GO. For this example, you'll need to:
- Triggers: Create a trigger for the investment confirmation step to match our "Investment Process Completed." Choose the trigger type "Page View" and configure it to fire on the confirmation page of the process. You can do this by specifying the page path as the trigger definition: The page path ends with "/confirmation."
- Keywords/Tags: Create a tag for each page. Choose the custom HTML type and select that it should be fired on all pages. You can insert any code you want to be rendered on that page. A simple example would be:
<script>
console.log('Seite geladen!');
</script>- English: CODE
To prevent tags from competing with each other, you can define an exception for this tag. Since we're creating a separate tag for the investment completion page, you can set the trigger created above as an exception. - Create a tag for the investment completion page: Choose the custom HTML type and select it to be associated with the trigger created above.
- Once you've completed these steps, your GTM container should be ready to start tracking the investment checkout.
- You can save this configuration under a version, give it a name and description, and start your testing by clicking on the Preview mode:
Testing and Verification
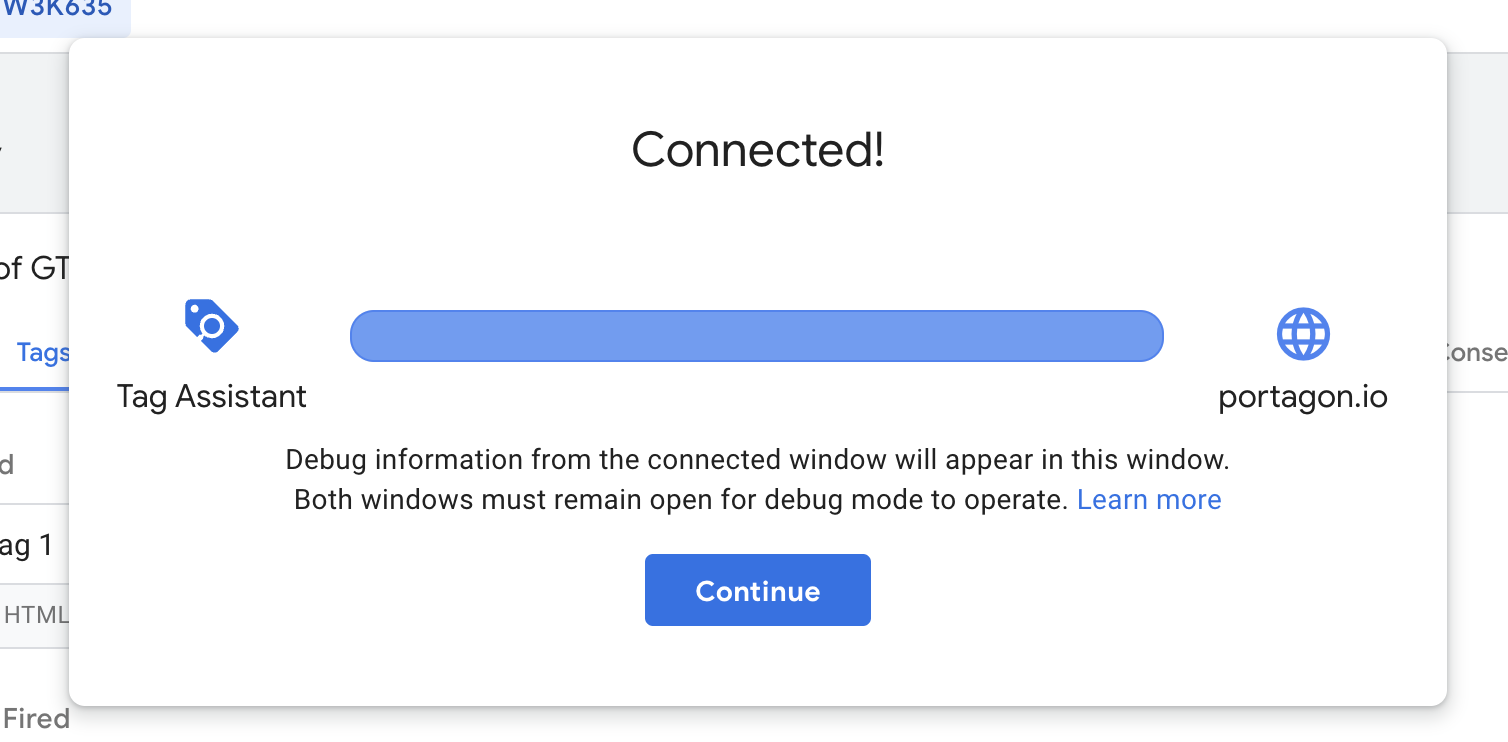
You will be prompted to enter the domain to track. Once you do this, a new tab will open for the checkout process, and GTM should be connected to the domain as shown in the figure. Click Continue to review your tags.
Checkout Process
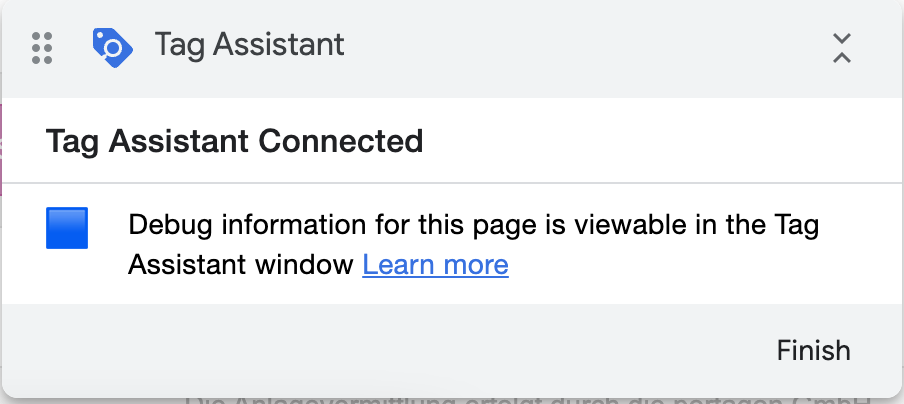
Proceed with a test investment to simulate the activity of an investor you want to track. In Chrome, you can install the Tag Assistant Companion extension for a better debugging experience. This will display the following popup for domains with an active GTM tag set.
English: Complete the investment process up to the investment confirmation. Then, go back to the GTM Debugger.
GTM Debugger
Every action/event on the connected domain is tracked and displayed here. On the left side, all actions are listed.
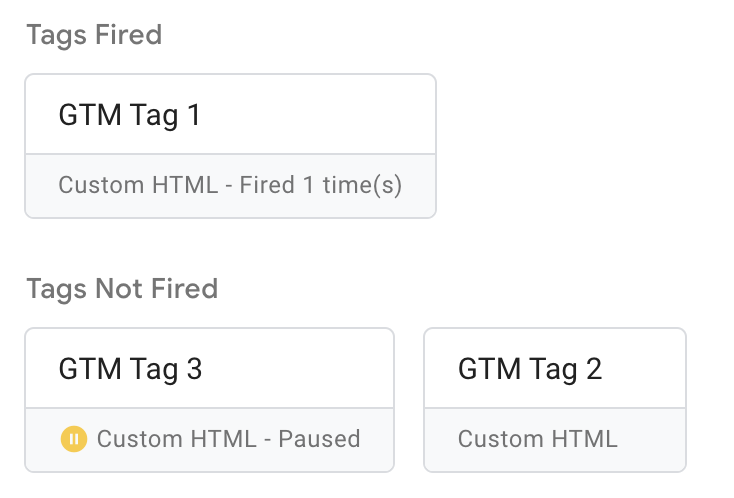
First, you can check if the triggers you defined are being triggered correctly. For example, "Investment process completed" should only be triggered on the last page.
Next, you can review the variables loaded with each event. In our case, we would expect the investment confirmation to load the variables into the data layer.
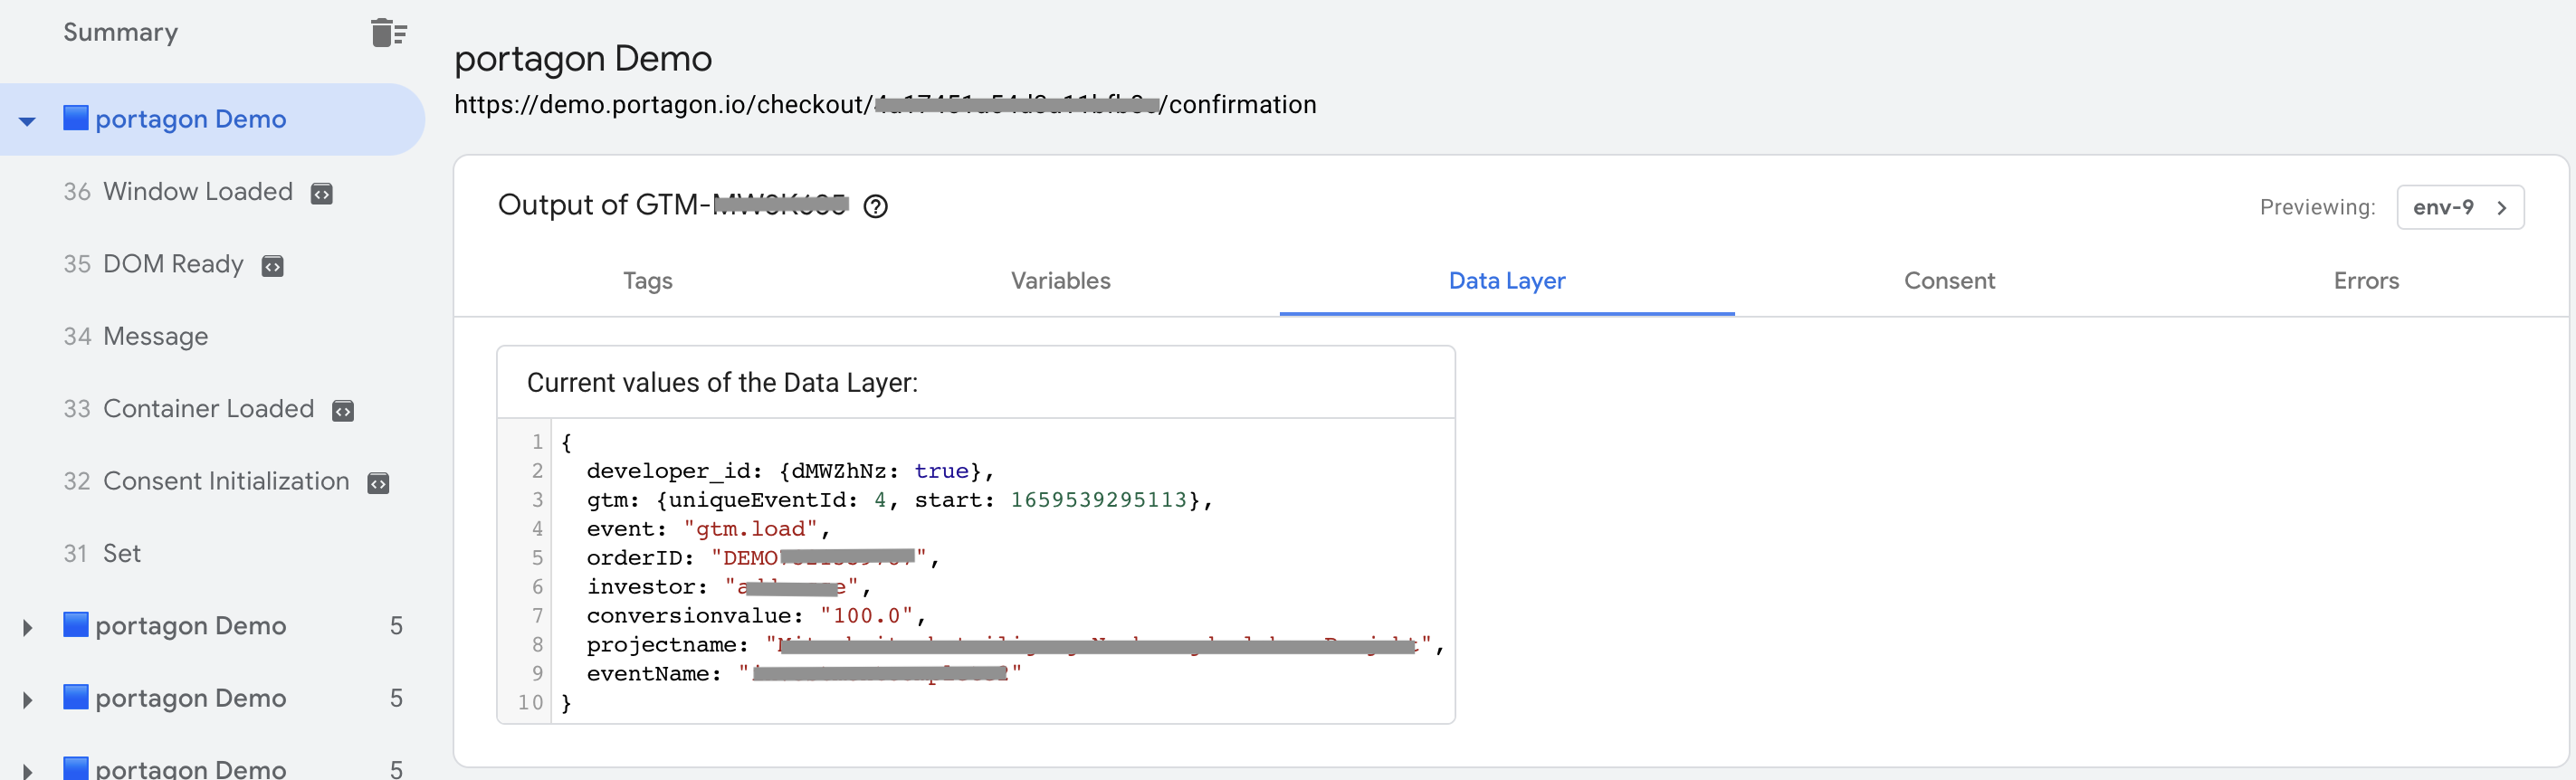
The Data Layer tab displays all the variables we defined in our GO tracking code.
For more details on the debugger view, refer to the official documentation.
3. Troubleshooting
Possible issues may arise due to:
Incorrect variable naming: Data layer variables are case-sensitive. Make sure to maintain the same casing from the tracking code configuration in GO to the variable setup in GTM.
Incorrect trigger definition: Your triggers may not behave as expected if you define them to trigger on one page ("/confirmations") while the correct definition according to GO Tracking is "/confirmation." If you have questions about the correct page path, feel free to reach out to our Customer Success Team.